Saturday, February 18, 2012

Camping with the girls - fancy quilting on busy fabrics

Some quilters say that it doesn't make sense to put fancy quilting on busy fabrics in scrappy quilts because the quilting doesn't show very well.  That is one approach.  Another alternative is to use fancy quilting to add even more texture to the quilt.  It all depends on how much time you want to put into the quilting.  I am growing fond of Camping With the Girls.  I plan to keep it for myself.  I want it to be special so I don't care how much time I spend on the quilting. 

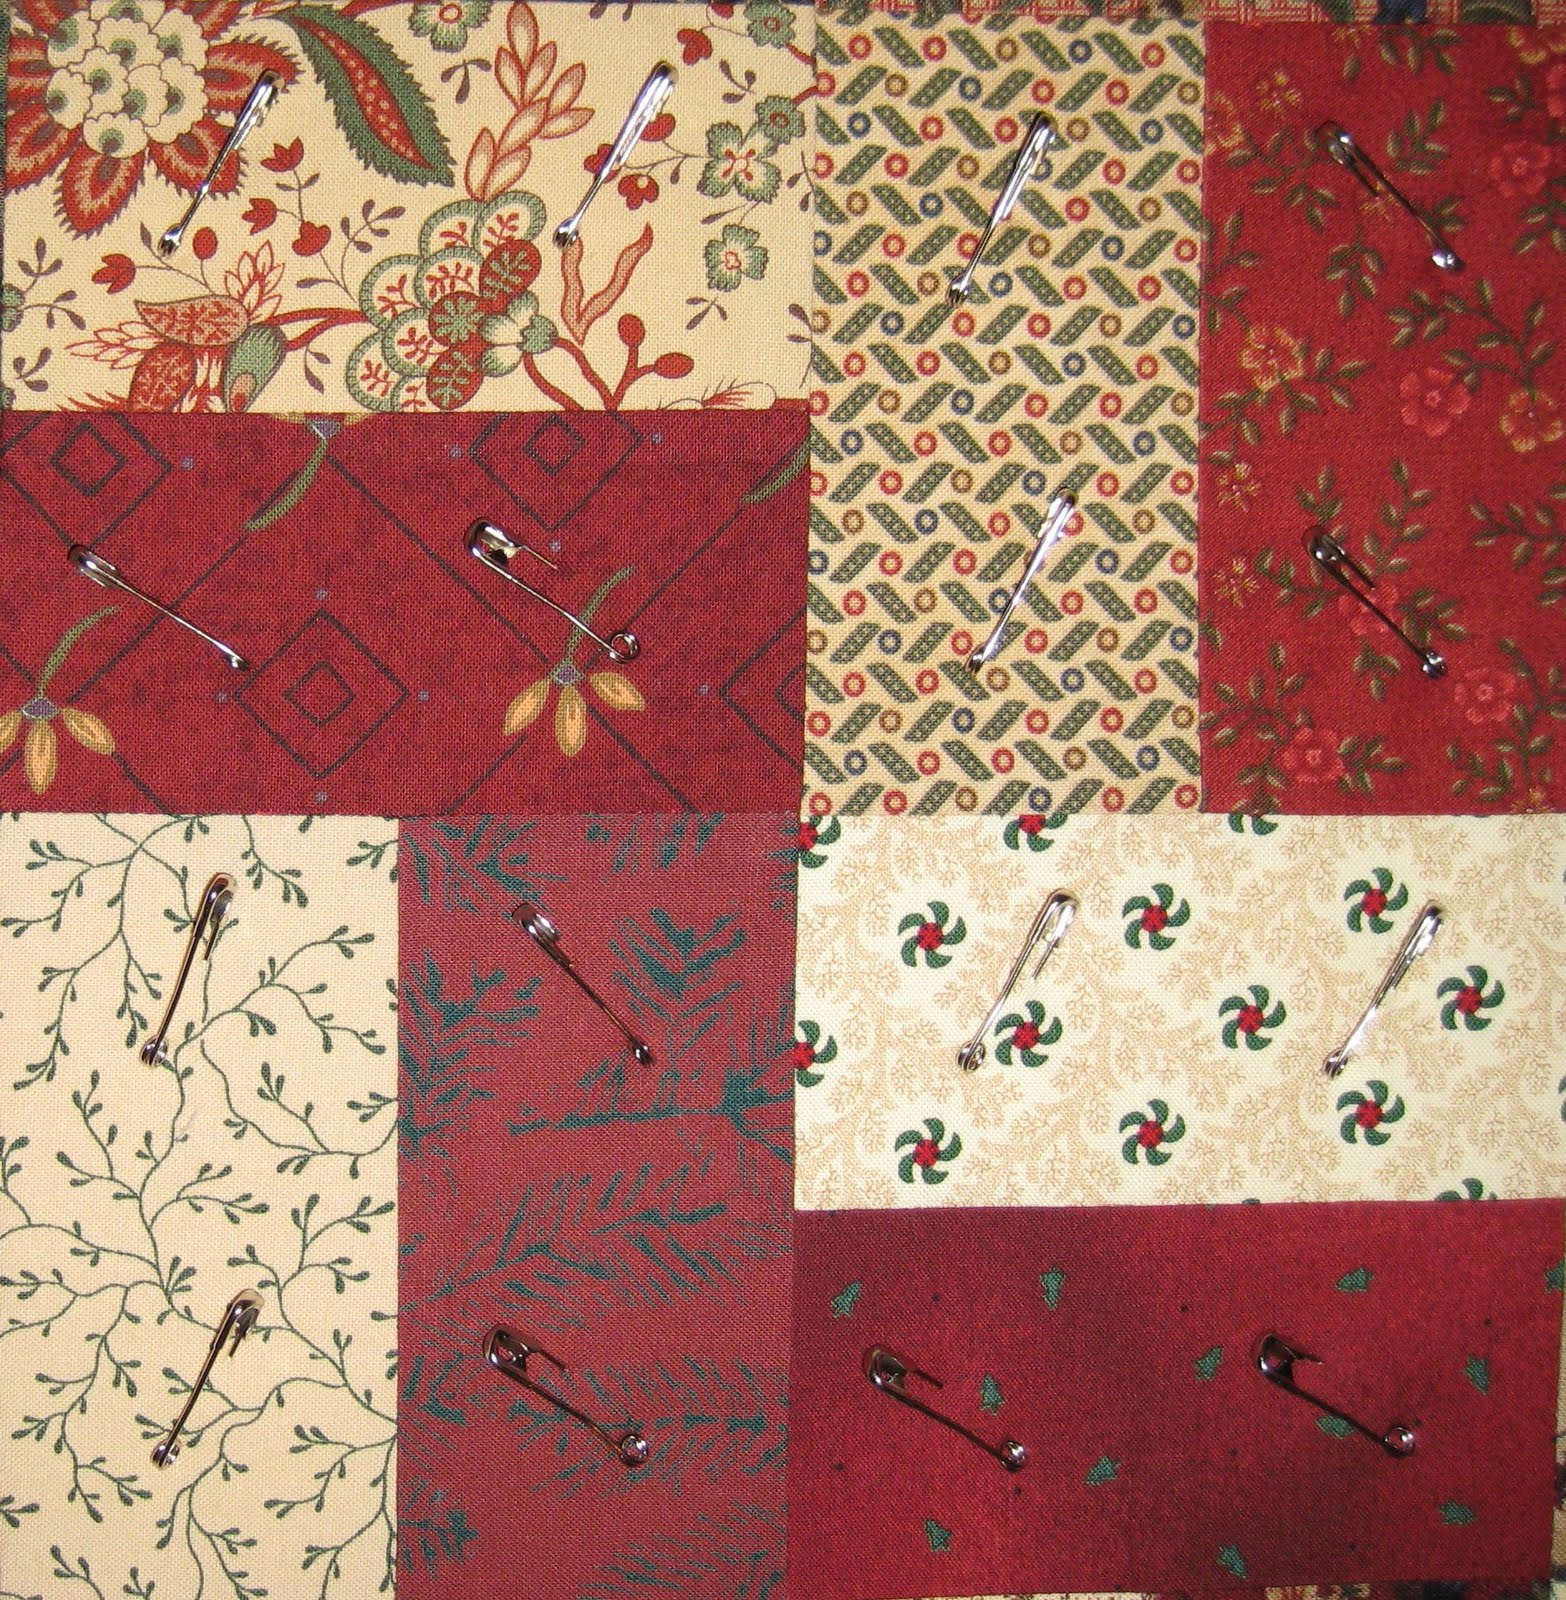
I collect good quilting stencils in assorted sizes.  (Why would I collect bad ones?)  Then I wait for opportunities to use them.  For this quilt, I was able to select 4 different stencils to fill space.  This is one of the spaces to be filled.


This is the stencil I selected for the space.


It would be difficult to mark a fancy shape like this well enough to see on the fabrics in the space to be filled .  In addition it would need to be done for each of the 12 blocks in the quilt.  In the end this visually-challenged quilter would have trouble seeing the markings well enough to quilt.  An alternative is to use Golden Threads paper.  This involves cutting the necessary size squares from Golden Threads paper, marking the quilting design on one of the squares, pinning up to 15 layers of the paper together, and then stitching through the layers with your sewing machine (no thread in needle).  The end result is that you have up to 15 pieces of the paper with the design marked on it.  You'd want to use a heavy needle such as a jeans needle to make the perforations more visible.  These are the papers with the perforations showing the quilting design:


Notice the beautiful fabric in the background.  That is the upholstered seat of my relatively new dining room chairs.  A little Christmas gift to myself.  Back to the subject at hand.  Notice that the layers of Golden Thread papers were pinned together so they wouldn't move during stitching.  I used to do the perforation step free-motion which was quick and did not involve turning the paper.  Now I use the walking foot with the stitch length set on 1.5.  This results in greater accuracy and perforations that are closer together, which makes it easier to remove the paper after quilting.

The Golden Threads paper is not cheap and is only available in pale yellow.  Someone told me you could just buy regular tissue paper in whatever color is best for the current project.  I tried that and will never do it again!  Regular tissue paper is not as durable as Golden Threads paper so it made a terrible mess.  It was awful.  Really.

When ready to start quilting, peel off one of the papers and attach it to the area to be quilted.  If you look at both sides of the paper, you will notice that one side is smooth and the other side has bumps.  Place the paper on the quilt with the bumps up.  That side is easier to see.  Pin the paper along the edges to hold it in place.


Determine a good place to start quilting to have the minimum number of starts and ends.  This stencil was a continuous line design with one start and one end.  I make it a habit to quilt the right half of the design first because it is usually necessary to roll the quilt on the right in order to quilt the left half of the design.  Be sure to replace the jeans needle with a normal needle prior to quilting.  Don't try to pin all of the papers before rolling the quilt.  The papers will get torn due to the rolling and handling.  Pin each paper when you are ready to quilt that block.

Next comes everyone's least favorite step - removing the paper after stitching the design.  Some quilters wait until all quilting is finished and then remove paper while watching TV.  I prefer to deal with it one block at a time.  If left until the end the papers get torn and little scraps get distributed all over the room.  I am not a fan of cleaning so I try to keep things neat as I go.  This also allows me to examine my quilting stitches to make sure tension is good before moving on to the next block.  I find it helpful to have good tweezers to remove little bits of paper that are stuck under the stitching.  After I think all of the paper is out of the stitching, I use a pet hair pickup brush to get the tiny pieces. 


Then I admire the block that I just quilted.  I get up, move around, have a drink of water or some beverage of choice, and then move on to the next block.  It's good to have breaks when doing very precise work.


After I have quilted all the fancy shapes in the entire quilt, I will probably add some stippling which will make the quilted designs stand out more.

I love quilting fancy shapes!

Wednesday, February 15, 2012

Camping with the girls - milestone

The ditch quilting is complete and all the pins are out.  That is always a milestone.  I've selected 4 stencils for some fancy quilting.  There's been a little despair.  My free motion ditch quilting is not as precise as I had hoped. 

Saturday, February 11, 2012

Camping with the girls - let the quilting begin

The quilt is pinned - rather heavily I might add.  I am a very methodical pinner.  For each block I determine the best way to pin considering how it will be quilted.  It then follows that all blocks will be pinned the same way.  There are 11 pins in the star blocks, 13 in the Delectable Mountain blocks, and 16 in the four-patch blocks.  I use a lot of pins because the first step will be to quilt the long vertical and horizontal seams between the blocks and I want to keep the intersections of each group of 4 blocks as square as possible.


It took a long time to upload that picture.  I had to eat cookies while waiting.  Anyway...

I am using one of my favorite battings, Quilters Dream Cotton, in Request (thinnest) weight and Aurifil 50/2 thread in tan (color number 2325).  I put a new Schmetz Microtex sharp needle (80/20 size) in the sewing machine because there are thick seams in some places.  (Normally I use Schmetz Microtex Sharp 70/10 with the 50/2 thread.)  The stitch length is set on 2.3.  The walking foot is on.  I am ready to start.

I am at the stage where I think this quilt is going to be great.  At some point (generally around the half-way point) it is inevitable that I will despair and think it is not going to be great because one thing or another didn't turn out as well as I hoped.  At that point you just have to forge ahead and work through the despair.  As I hit the home stretch, I am usually very happy with the quilt.

Thursday, February 9, 2012

Camping with the girls

This is a Miss Rosie's Quilt Co. pattern called Elizabeth.  I named my quilt Camping With the Girls because I purchased the pattern on the way to one quilt camp and pieced the blocks at another quilt camp...and no boys were present at either camp!  The quilt is 68" x 68".


I just finished sewing all the rows together so ignore the fact that it is not quilted yet.  Ignore the amateur photography with distorted blocks and poor lighting.  Ignore any stray threads you might see with your eagle eyes.  While this quilt is not exactly the same coloring as the photo on the pattern, it has the same look.  I love, love, love a quilt like this.  It is warm and cozy and comforting.  Bright and white quilts don't create the same feeling for murky me.

The quilt contains three kinds of blocks - Sawtooth Star, Delectable Mountain, and Four-Patch - set on point.  This makes the quilt interesting, but it also complicates the pressing.  The pattern gives good directions, which I did not follow 100%.  I thought I knew better, but that was not always true.  However I would probably do it my way again if I ever make this quilt again.  I can be stubborn.  Oh, yeah.

The quilt is actually a medallion design with the four Delectable Mountain blocks in the center.  Then there is a row of Sawtooth Star blocks on all four sides with Four-patch blocks in the corners.  And so forth.  This is a closeup of the quilt center:


Normally a medallion quilt is assembled from the center out.  Because all of the blocks in this quilt are the same size (8" finished), the blocks are sewn into rows and then all of the rows are attached to each other. 

There are at least fifty prints in this quilt.  That makes the top more interesting and creates a texture before any quilting is done.  The lightest prints are in the background of the star blocks and in part of the Delectable Mountain blocks.  There is a range of tan or taupe with red prints in the Delectable Mountain and the Four-patch blocks.  The centers of the stars are shades of red with some rust mixed in.  The star points and Delectable Mountain points are a range of browns.  A few prints had green or blue in them.  While piecing, I occasionally wondered if a particular block was going to be too different to use with the other blocks.  If so, I would make a replacement block.  In the end, all of the original blocks were used.  No replacements were needed.

Here are closeups of two other sections of the top:


Next step --> prepare the backing and pin the quilt.  I chose not to mark quilting lines because the fabrics in the top are too varied and generally too dark for easy marking.  This top may require a Golden Thread paper solution.


Wednesday, October 5, 2011

Playing with my nickels

I have been playing with my nickels, a.k.a. 5" squares of cotton.


These are not to be confused with nickels, a.k.a. 5 cent coins.


These nickels are not equal.  5" squares cost more than 5 cents.  Some quilt shops sell charm packs which are usually an assortment of 5" squares from a collection.  Charm packs are a good way to get a sample of each fabric in a line and a good way to get an assortment of fabrics for scrap quilting.  When purchased, the squares average 15-20 cents each.  I rarely buy the "ready made" charm packs. 

Some quilters cut virgin fabric into nickels.  Virgin fabric is fabric that was purchased, but has never been cut into and is therefore still in pristine condition.  I don't do that.  I cut nickels from remnants of finished projects when the pieces left over are too small to fold and stack on my shelves.  If not used this way, the scraps might have been discarded.   This makes me feel very economical.

Nickels are easily stored in a Rubbermaid tub.  They are great to take along for a sewing day at someone's house.  They eliminate the need to plan ahead and cut pieces for a project.  There are even books showing many blocks that can be made entirely from nickels.  Enough about the merits of nickels.

These 4 1/2" units were made from nickels.


It took 120 of the units to make this 40" x 48" top.


I have enough made for another top the same size.  Both will be donated to a nursing home.

Tuesday, July 26, 2011

Enjoying my stash

I am the kind of quilter who likes to collect great fabric.  Then someday I use it.  Once in awhile I keep it too long and no longer love it, but that is a different story.  For years I collected fabrics that would be good for baby quilts.  I had absolutely no idea how those fabrics would be used.  Last week I went to my stash to find ingredients for a baby quilt.  My eyes settled on this delightful, funky plaid:

There was enough for the background of a quilt.  I decided to pull fabrics to match the colors in the plaid.  This is what I selected:

The red on the right was perfect because it had bits of pink that matched the pink on the left.  The yellow was good because it had a lot of variation, looking bright yellow in some places and orange in others.  I chose not to include a fabric the color of the deep blue in the plaid.  It seemed too bold for what I had in mind. 

The pattern was one I'd made many times so it went together quickly.  The block are set on point.  The quilt has setting triangles.  In the past I've cut all setting triangles from the same fabric.  This is the first time for using scrappy setting triangles.  This is the finished (unquilted) top:

It's a happy quilt!

I will cut bias binding strips from the plaid.  Today I hope to find the perfect back for it.  Can't wait to see it finished.

Saturday, May 14, 2011

Quilting the big ones

People often ask how to manage the bulk of a large bed size quilt on a home sewing machine.  The one I am working on now - Big ZZ - is 95" x 95".  I am still quilting the long vertical zigzags in the ditch.  I started by rolling the quilt from one side to the center zigzag.  I put it under the machine with the roll on the right and the unrolled portion to the left.  I wish I'd taken a picture at that point.  The roll seemed really big

After I had quilted in the ditch on both sides of one zigzag, I removed the pins from that zigzag.  Removing pins is a milestone for me.  Makes me feel encouraged.  Then I quilted the next vertical line and got to remove more pins.  Another milestone.  After I had quilted several more vertical lines and removed more pins, I started thinking the the roll was no longer so big.  More encouragement. 

This is how the quilt looks right now.

The first thing I ever read about packaging the quilt said to roll up both sides towards the center and to keep the package neat and compact as you worked.  Every time you unrolled the right side, you were supposed to roll up the left side.  I tried that, and it did not work for me.  I spent too much time and effort trying to keep the package neat.  My machine sits on top of a table so I don't have a large flat quilting surface.  It seemed like the roll on the left kept jerking the package in the wrong direction and making my quilting eratic.  Eventually I decided that it was better to keep the left side piled up so it was free to move around and less likely to get caught on the corner of my machine. 

Notice the chair pushed up to the table in the lower left corner of the picture.  That is a quilting fence.  It keeps the quilt from falling off the table and jerking the package in the wrong direction.  There are also 3 chairs pushed up to the table on the opposite side, but they are not visible in the picture.

The child in me is wondering how many more vertical lines I have to quilt before I reach the edge.  It's an are-we-there-yet thing.  The adult in me does not want to unroll the package to find out because it would require me to take it out of the machine and roll it up again.  That is not my favorite part.

Back to quilting.

Tuesday, May 10, 2011

Little zz and big zz

Zigzag, that is.  Little zz (17" x 22") is quilted and bound.  And very sweet.

Big zz (95" x 95") is pinned and ready to quilt.  I would be less than honest if I didn't say that I am feeling...trepidation.  It is so much larger than the projects I've worked on lately and very heavy with its 2000 pins.  I chose to pin it every two inches to keep the fabric from shifiting and hopefully to keep it nice and square.  This is how each 8" block is pinned.

The first thing I will do is (free-motion) quilt the long lines between the red/green zigzags and the lighter ones. 

Even though I am feeling that trepidation, I am also excited.  Right now I am going to prepare my machine and then get started.

This might take awhile...

Saturday, May 7, 2011

Saturday morning pin emergency

I have pinned the middle 40" length of a 95" x 95" quilt.  The supply of pins is dwindling fast.  Would my supply of 1300 one-inch curved pins be enough?  The blocks are pinned very consistently with pins every 2".  I did the math.  I need 2052 pins.  YIKES! 

Time to visit my local quilt shop.  Or shops.  Whatever it takes.

Question:  How much will the quilt weigh with over 2000 pins in it?

Wednesday, April 27, 2011

Little blocks

How cute is this? 

The finished size is 17" x 22". Each little strip is 1" x 2".  The quilt has 188 pieces. (I'm into quilt statistics.)


I made it because I was cutting strips from fat quarters and kept ending up with a strip that wasn't wide enough for the quilt in progress.  I cut 1 1/2" strips and set them aside for later.  Later came before the other quilt was finished.  I pieced this top over the last few days.  It isn't quilted yet, but we already established that I can show works in progress (WIPs). 

So here is an idea.  Imagine that you are making the zigzag quilt for a little girl in baby quilt or larger size.  How much fun would it be to make a miniature quilt for the little girl's doll? 

I'll tell you.  It would be SO MUCH FUN.  Try it.

Disappearing zigzag


No stone will be left unturned!  I decided to try another version of the same design shown in the previous blog entry (Diagonal Zigzag - the multi-pastel quilt with the blue border).  For this new version I made all the 8" blocks the same.  The zigzag disappeared and the result was more of a basket weave. 

This is one block.

I thought this might appeal to a brand new quilter who wanted to focus on piecing and not worry about how to arrange blocks that are scrappier.  I found all but the blue fabric in my stash.  I selected the border print first.  It is from a great old Laurel Burch line called Jungle Songs.   Next I found four fabrics to go with it.  I cut enough 2 1/2" x 4 1/2" strips of each color to lay out several blocks.  I played with them for awhile to decide where each color would be placed in the block.  In the end, I liked that two warm colors went in the one direction and two cooler colors went in the other direction.  I also liked that there were floral, geometric, dotted and marbled prints in the mix.

Some baby will be happy to own this quilt.

Wednesday, April 13, 2011

Diagonal zigzag

It is a little out of character for me to make a whole bunch of the same quilt, but I am enjoying
1 - using fabric in my stash and
2 - making samples to (hopefully) inspire members to make baby quilts for a guild project.

There were 3 zigzag quilts posted earlier where the blocks were set on point to make a vertical zigzag.  Here are 2 variations where the blocks are not set on point, resulting in a diagonal zigzag.


The pink one has twenty-five 8" blocks.  The other has sixteen 8" blocks and a 4" border.  Both are 40" square.

I had everything for the pink one and all but the green for the othe one in my stash.  If I look real hard, I can see that I made a tiny dent in my stash.

Friday, April 8, 2011

Work in progress

It occurred to me that I've fallen into the habit of only blogging when I have a finished quilt to show.  That was really not intentional.  In general, quilters get a little too concerned about productivity and having things finished.  And maybe we're a little too sensitive to the fact that we have UFOs.  Many, many UFOs.  We worry about getting them done.  We think we would be better somehow if we immediately finished every top we made.  I kind of like the idea that a hundred years from now some woman will hold up one of my UFOs at a guild meeting and say, "I found this quilt top in a trunk that belonged to my husband's grandmother..." 

I am quilting something right now.  It will not be the top in the trunk.  It may actually be finished this weekend.  But here it is in all its unfinished glory - a work in progress.


There.  The ice is broken.  I can show works in progress.

This is another of the zig zag quilts.  Why, you might ask, is she making so many of those?  This will be the suggested design for our guild's 2011-12 baby quilt project.  I want to have a lot of samples to show to get members fired up about the project. 

The earlier ones had the blocks set on point.  This one does not, which makes it a perfect project for a beginner.  So we might use this for new quilters in our guild's mentor program too.

This is what I am doing for the quilting.  Quilting in the ditch between the white and the pink zig zags.  This was done free motion due to the number of turns that would have been required.  Now I am quilting wavy lines in the center of each zig zag.  I like baby quilts to have substantial, but not heavy quilting.  To make the quilting more substantial, I use fairly short stitches.  I think longer stitches are more likely to break if tugged or pulled.  Tugging and pulling is a given if the baby becomes attached to the quilt and continues to use it for a long time.  I am always happy when a baby quilt is used.  I feel kind of sad when it is saved so nothing will happen to it.

Monday, March 28, 2011

Illusions

This quilt contains the same 6 thirties prints that were in a quilt shown in the March 26th post. 


It took more planning than the other quilt and required more concentration.  I actually pieced this one before the other one, but quilted them in the opposite order.  I expected to like this one better, but that is not the case.

Even though both quilts have the same number of fabrics, the other quilt looks like it has many more.  I'm pretty sure that is why I like it better.  The illusion can only be due to the random placement of the fabrics. 

Temptation

It's everywhere.

Saturday, March 26, 2011

Quilting Freedom

In recent years, each president of our guild has chosen a theme for the year.  Last June President Georgia announced her theme - Quilting Freedom.  The freedom to be whatever kind of quilter you wanted to be.  I immediately embraced the theme and granted myself the freedom to do whatever project I wanted to do.

I love making baby quilts.  They provide immediate gratification because they are such quick projects.  At least the ones I make are quick.  I can't speak for you.

About 10 years ago, I started collecting fabric that would be good for baby quilts - pastels, brights, you name it.  Then I heard that babies are entertained by the contrast between black and white so I started collecting good black on white and white on black prints.  When I reorganized my fabric a year or so ago, I realized just how much good stuff I had.  I set about to use some of it.

Last July and August I made 14 baby quilts.  Some were designated for my soon-to-be grandson.  The rest were Linus Quilts.  I made 4 in this design.  It is great for using up odds and ends.  The smaller squares are 2" finished and the bigger blue squares are 4" finished.  The finished size of the quilt is 36" square.

This is another design I like to use.  The star blocks are 8" square and the finished size of the quilt is 38" square.  Sometimes I make it with 9" blocks and then the finished size is 41" square.  

I cut the pieces for the star blocks and put enough pieces for nine stars in small boxes to be used for quilting days away from home.  When I started making this type of quilt, I also started collecting good border prints with black backgrounds.

This is one of the quilts I made for my grandson.  The background print for this quilt is the loveliest, softest yellow with blue and green.  A really good fabric.  I bought it en route to Colorado for Harriet Hargrave's first ever Machine Quilting Celebration in 2004 or so.  I knew I would need it some day.  And I did.  I always know best.  Just ask me. 

I cannot resist adding this next picture.  This is my grandson laying on his black and white star quilt.  He makes me smile.

Last fall I made a few more baby quilts like the ones above.  Then a couple weeks ago I started thinking about another design.  I gave myself the freedom to try it out.  I love it!  It isn't quilted in this picture, but it has been quilted since.  Can you believe there are only five different blue prints in this?  And one really good background print that was hiding in my stash closet.  This is 34" x 46".

Then I couldn't stop.  I had to try other variations and I used thirties fabrics for the first time ever.  How sweet is this?  Pretty sweet.

I am quilting another zig zag quilt today. 

It is all good.

Sunday, March 13, 2011

Finished...or so I thought

To recap, I had eleven blocks left over from Star Spangled. I used them to make 3 two-block wall hangings and 4 one-block wall hangings. I finished the last of the 7 wall hangings yesterday, washed it, and photographed it.  I am happy.  My life is complete...for the moment anyway.

I've grown quite fond of this little feathered heart.  One more picture of it won't hurt.  You can't have too many pictures of feathered hearts, can you?

There is fabric left over from setting triangles and borders for all the wall hangings.  Time to tidy up a bit.  Sort it by color, fold it, and put it away before things get out of control and there is a big mess.

Wait.  There is something wrong with the math.  3 two-block wall hangings plus 4 one-block wall hangings equals 10 blocks.  11 minus 10 is 1.  My eyes scan the room.

Oh, yeah, now I remember.


When I made all the blocks, I wasn't quite sure what I would do with them.  This block was supposed to be one that looked kind of old and faded and blended into the quilt.  The kind of block that made everyone stand back and say, "I love how that one block looks all faded."  They are somewhat mesmerized and stare at the quilt for hours.

Then Star Spangled turned into a red, blue, and gold quilt.  This green block was not used.  When I pulled fabric for the 7 wall hangings, I couldn't find anything that I liked real well for this block.  So I set it aside.

Now what?  I am so ready to move on to a new project.  I could just toss it.  But will I?

Friday, March 11, 2011

Danger Zone

I am in the danger zone.  You know what it is.  You've been there.

I am finishing one project, but I'm really thinking about the next one.  And I mean really.  I've got the graph paper out.  I've pulled fabric.  I've cut a few strips.

Evelyn, step away from the new project.  Finish the old.

Monday, March 7, 2011

Frugal to a fault AND stubborn

The is Star Spangled.  I had 11 blocks leftover from this quilt. 

When I embarked on my mission to use those 11 blocks, I vowed that I would do it with what was currently in my stash.  No additional purchases would be made.  I was able to piece 7 wall hangings or table toppers from my stash.  I found pieces of batting for all of them.  I did not have to cut into new batting or pieces that would work for much larger quilts.  I also found backing for all of the tops in my stash.  This is the backing I wanted to use for one of the tops.

The green part is not the wall.  It is attached to the backing.  But why on earth are these strange green strips attached to the back?

You've heard of hair extensions.  These are quilt back extensions.  The top measured 17 1/4" x 28".  The fabric that I selected for the back was a 1/2 yard cut that had been washed.  It was big enough to cover the entire back, but the obligatory 3" extra on each side of the quilt would not be there.  So I sewed these strips onto the backing very carefully to make sure at least 17 1/4" would remain for use in the quilt back.

Why would someone who owned all of this do such a thing?

That was my stash closet.  I buy a lot of half yards and fat quarters for my collection.  They are all folded consistently and stored in the stash closet.  What I haven't told you is that I have a separate stash of fabrics that would be good for backs.  Many were on sale in back rooms...or full price, but too beautiful to ignore.  These are stored in my stash piesafe because they are folded differently.  They don't fit in the stash closet anyway.

Why not use something from my stash piesafe?  Because I don't want to cut into a 4 yard+ piece of fabric if something from my stash closet is technically big enough.

Do you really need 3" extra for the backing/batting?  No, BUT (big but) if you don't have it and you plan to include free motion quilting anywhere close to the edge of the quilt, you will sacrifice a lot of control.  I was quilting feathers in my borders.  I had skimped on backing for some of the quilts posted in recent days.  Many feathers were less than perfect.  Could it be due to the fact that I didn't have enough control when quilting in the border?  It didn't make sense to sacrifice control in the border when my reason for finishing these quilts now was to get better at quilting feathers without marking. 

Refer to the picture below.  My thumb rests on the quilt top.  The rest of my right hand is on the backing and batting.  (This particular backing was a little less than 3" so my little finger was not on the quilt back.)  If it had not been holding the camera, my left hand would have been on the roll guiding the fabric.

I should have had my nails done...

To avoid cutting into bigger yardage, to restrain myself from running out to make a 3/4 yard purchase, and to still have 3" extra all the way around the top, I invented quilt back extensions.  I will probably not bother to get a patent on them so feel free to use quilt back extensions if you find yourself in a bind.  No permission required.

Still you might ask why someone would go to all this trouble.  Entire websites have been devoted to disorders of this nature.  This blog is not one of them.

This is the finished quilt.

These are the best feathers so far.  I felt more relaxed because I had better control while quilting.


The moral of the story:  To quilt my best, I need 3" extra backing and batting on all 4 sides of the quilt.

Saturday, March 5, 2011

Thread of a different color

Would you use this thread to quilt this fabric?

The tan is far too light even thought it is the same color as the tan in the blue print.  I used the blue on both of these fabrics.  I used the rust for background stippling on the rust fabric.  But I wouldn't always have done that.

Flashback to November 17, 2000.  (The date has been changed to protect innocent dates.  It was sometime that year...or the year after.)  I'm standing in a quilt shop with my quilt top trying to decide which thread matches the border fabric best.  I was a fairly new quilter then.  I thought the thread had to match exactly.  And if the border was a multi-color print, I might just need to use monofiliment so it would match all the time.  End of flashback.

Is there a flaw in that thinking?  I don't know, but it isn't what I now do.  Now I use thread with some degree of contrast.  There is an advantage and a disadvantage to using contrasting thread.  The advantage is that you can see it better.  The disadvantage is that you can see it better.  (Hmmm...I could probably go into politics.) 

I can explain.  Free motion quilting is done in every direction.  When doing free motion quilting, you must keep track of where you have already quilted as well as where you will quilt next.  To keep track of where you have already quilted, you look at the thread quilted into the fabric.  It could be in plain sight or could be hidden somewhere behind the sewing machine foot.  I don't know about you, but I need all the help I can get to see the thread.  It is a definite advantage if the thread color does not match exactly.

The fact that the thread shows after quilting is only a disadvantage if you are disappointed with how it looks.  This is what I think.  If you can see it better while you are quilting, you may just do a better job of the quilting.  And even if you don't...please...cut yourself some slack.  You don't have to be perfect.  (Needing to be perfect only applies to me, a typical Virgo from the get-go.  It doesn't pertain to anyone else, including other Virgos.)  So quell your disappointment.  Accept that you did the best you could on that quilt on that particular day.  You will improve if you keep trying.

Does this mean that I quilt white fabric with black thread for ultimate visibility?  Certainly not.  The thread can be a little darker or lighter or a slightly different shade of the color.  It can be an entirely different color as long as the color of the thread and the fabric are the same value. 

Here is a closeup.  The blue looks better than you probably imagined.

The spool of tan looks too dark for the background stippling on the light, but the end result looks fine.

The key is to take a little of the spool and look at one strand against the fabric to be quilted. 

This is the finished quilt.